Saturday, November 29, 2014
Fork hell.
Oh yeah, why I needed the serial number for the Legend. So I had to buy a new fork cap, as I am dumb. The front wheel was slowly wobbling in turns, so I'm trying a few things to try to fix it. I realized that the fork oil was at least 10 years old, so I started to pull the front end apart, also with the intention of replacing the headlight mounting tube rubber bits. These must have bit designed with english summers in mind, since the SoCal heat basically turned these rubber mounts into a combination of chewing gum and play-doh. Also, although there's some pad on them still, I figured I'd so the brake pads as well. Anyway, I took a fork apart, drained the oil (STANK!) refilled it off of the bike and started to reassemble. This is not a one-man job (at least for a novice,) but what could go wrong? Answer: I cross-threaded the fork cap trying to compress the spring and screw it on at the same time. BTW, I *had* read that this is a two-man job, I'm just fucking stupid sometimes. So when my fork cap arrives, I'm going to try a recommended method of doing it off the bike, with one person holding down the fork cap, while the other person rotates the sliding tube to try to attack it.
Legend engine number
I'm almost somewhat certain that the engine number is 396D 1X 076111. Almost. It's a pain to find the serial number on the legend, as it's stamped in little dots on a cast part of the engine (right side, above the crankcase,) that looks like there should be a plate there that fell off. Some people suggested trying a rubbing, but having a flashlight close up at the right angle is what sorta worked for me.
Sunday, February 6, 2011
Gearchange Shaft Replacement!
Here's my log of replacing the shifter shaft on a 1999 Triumph Legend. It should be fairly similar on any Hinckley Triple. Some of the steps could probably be performed in a different order, and some step could be easier, but this is how I did it (or wish I did, in some cases.)
Tools:
Hayne's manual
small jeweler's screwdriver
rear stand w/paddles-I cheap Harbor freight rear stand with the optional paddles. I did have to cut down one of the paddles to make it fit. I see where other people have used jackstands, which would raise the bike higher, but they don't seem like they wouild be as stable, and I'm a coward.
motorcycle lift-Also a cheapy Harbor Freight lift with a piece of plywood that fits pretty good over the sump-I drilled out a hole where the oil drain plug goes, although that's not really necessary here.
metric ratchet set
Breaker bar
T55 star socket
Screwdriver bit assortment, including the star bits
Snap ring/circlip pliers.
Parts:
oil sump gasket
sprocket cover gasket
shift asssembly
circlips
washer
1. Remove left footrest and footrest bracket.
This is probably the only step I forgot to take a picture. There's two hex bolts connecting the pedal bracket to the frame. On mine, there was a cap on one of them, which caused me an unreasonable amount of pain, until I realized it was a cap. I removed this with a jeweler's flathead screwdriver, and proceeded to bunge it up. Luckily, I saw some more at Home Depot that look just as good.
2. Remove Exhaust system
This makes it a lot easier to lift and lower the bike. I lied, I also didn't take pictures here. I took off the mufflers first. They're held on by a clamp that attaches them to the headers, and a bracket that attaches them to the frame. I just removed the bracket from the frame when I saw how difficult it was going to be to remove the mufflers from the bracket.
Then remove the exhaust headers-these were surprisingly loose on mine.
3. Drain oil
Took out the plug, and then the oil filter.
4. Remove the oil sump.
This was kind of a pain, since there's a bolt for the sump underneath the rear linkage. Some people built a bit to fit between the bolt and linkage-this might be easier if you have an angle grinder to cut one down, but a hacksaw just won't cut it (ba-dump-crash!)
What I did was the following-raise the bike with the lift, unhook the linkage, remove the bolt, put the linkage bolts back in, lower the bike, put it up on the rear stand to do the work.
Unhooking the linkage wasn't bad, with an assistant. I basically took the nuts off which involved my assistant holding the nuts in place, while I used the T55 star socket on the breaker bar to loosen them. Then had my assistant gently lift and lower the rear wheel while I worked the bolts out. The linkage can then be wiggled out. Then I removed the sump bolt underneath the linkage, and put the bolts back in, the one closer to the front of the bike first, and then the rear one. Again, having someone raise and lower the rear wheel helped a lot.
Here's a photo of the linkage from the right side of the bike:
and from the right, with the nuts off:
Then, with the bike on the rear stand, I took out the bolts holding on the sump. There's 17 bolts, 15 black ones around the edge (14, if you've already taken off the one underneath the linkage,) and two silver ones in the middle that are a pain in the ass to find. There's three big bolts that seem to be different oil drain plugs, kind of in a row from left to right if you're sitting on the bike. The two silver bolts are kind of in the gaps between these plugs. One isn't so bad to find, but the one to the left of the bike is up in there kind of far.
The sump cover should come right off, clean the old gasket junk off the cover and the bike. I carefully used a razor blade.
5. Remove the oiler tube
Here's the oiler tube:
I wish I had removed this earlier-it would have saved me some pain. There's two bolts holding it on, with brass washers on either side of the tube. It might require some light wiggling to remove. Beware dripping oil!
6. Remove the sprocket cover.
There was certainly some cursing here on my part. There's 8 bolts holding this guy on. There's two long ones, a medium one, four short ones, and a very short one. First remove the three bolts around the clutch cylinder:
There's two very long bolts and the very short bolt, as I remember. After removing these, gently twist, wiggle, and curse the clutch cylinder out. There's a rod that extends into this, be careful. After you get the cylinder off, pull out the rod.
Then I took out the bolts around the broken shifter, there's two short ones, and the medium bolt like so:
Then there's two more bolts on the cover, one towards the top, and one towards the bottom.
After you get all of the bolts out, and the clutch cylinder removed, use this trick I got from webbikeworld. Get a 8mm box wrench, and bolt it to where the clutch cylinder was. Gently tap the cover with a rubber mallet and pull on the wrench to get the cover off-there's a gasket that's kind of holding it on.
Be disgusted with the insane amount of dirt that collects in there.
Clean the old gasket off the bike and cover.
7. Remove the broken shifter!
Start by removing the circlip and washer from the outside of the shifter, as well as the stopper bolt to the left of the shifter:
Then get up underneath and remove the circlip from the other side of the shifter. These pictures were from before I discovered I needed to remove the oiler tube. Sorry the pictures are out of focus:
Take off the washers, the spring guide, and the spring:
Here's where it gets fun. Hopefully, it's easier for you. You might want to start cursing now to warm up.
Remove the stopper plate. This is the plate between the the Quadrant (that's the part of the shifter shaft with the teeth on it,) and the gearchange drum (the big cylinder deal with the grooves in it.)
You can kind of see it here:
The plate is held on by two bolts, one on the bottom, and one on the top. It was a tremendous pain to get the plate out. What finally worked for me was to manually rotate the drum in a counter clockwise position if you were facing the right side of the bike. After doing this, I could see almost all the teeth of the quandrant teeth and the pawl carrier. This is what the removed plate looks like from the right side of the bike:
After you get the plate off, the gearchange shaft should come out.
8. Put in the new shifter!
This should slide right in. To mesh the gears properly, one of the quandrant teeth should be on the outside of the pawl carrier on either side. You can rotate the gearchange shaft to make sure it's good.
Put the stopper plate back on. A lot of wiggling and cursing helped me here. Getting the little tab in there right helps. No good advise from me on this.
Put the washer and circlip on the outside of the bike where the shifter shaft comes out, and replace the stopper bolt.
Put the spring back on the inside of the shifter, making the prongs go on either side of the quadrant peg and stopper bolt:
Put the spring guide back in, the two washers, and get ready for some cursing! The circlip that goes on there is a pain to get back on. Lots of pressing on the washers, the circlip popping back off, and cursing. Looking at the circlip on the outside will tell you how it should look on the inside when on.
9. Put back on the oiler tube.
It should be pretty self explanatory. Remember it's washer, oil tube, washer, bolt.
10 . Put back on the oil sump.
I used some gasket sealer (non-hardening) from autozone and the gasket. Tighten the bolts in a star pattern to 12 nM. I put all of them in, except the one under the rear linkage. I reversed the process of lifting and removing the linkage from above to get the last one back on.
11. Put the sprocket cover back on.
Gasket w/sealer. pretty simple. Put the rod back in and the clutch cylinder. You might need to bleed the clutch after this.
12. Put the exhaust back on, headers first.
Tools:
Hayne's manual
small jeweler's screwdriver
rear stand w/paddles-I cheap Harbor freight rear stand with the optional paddles. I did have to cut down one of the paddles to make it fit. I see where other people have used jackstands, which would raise the bike higher, but they don't seem like they wouild be as stable, and I'm a coward.
motorcycle lift-Also a cheapy Harbor Freight lift with a piece of plywood that fits pretty good over the sump-I drilled out a hole where the oil drain plug goes, although that's not really necessary here.
metric ratchet set
Breaker bar
T55 star socket
Screwdriver bit assortment, including the star bits
Snap ring/circlip pliers.
Parts:
oil sump gasket
sprocket cover gasket
shift asssembly
circlips
washer
1. Remove left footrest and footrest bracket.
This is probably the only step I forgot to take a picture. There's two hex bolts connecting the pedal bracket to the frame. On mine, there was a cap on one of them, which caused me an unreasonable amount of pain, until I realized it was a cap. I removed this with a jeweler's flathead screwdriver, and proceeded to bunge it up. Luckily, I saw some more at Home Depot that look just as good.
2. Remove Exhaust system
This makes it a lot easier to lift and lower the bike. I lied, I also didn't take pictures here. I took off the mufflers first. They're held on by a clamp that attaches them to the headers, and a bracket that attaches them to the frame. I just removed the bracket from the frame when I saw how difficult it was going to be to remove the mufflers from the bracket.
Then remove the exhaust headers-these were surprisingly loose on mine.
3. Drain oil
Took out the plug, and then the oil filter.
4. Remove the oil sump.
This was kind of a pain, since there's a bolt for the sump underneath the rear linkage. Some people built a bit to fit between the bolt and linkage-this might be easier if you have an angle grinder to cut one down, but a hacksaw just won't cut it (ba-dump-crash!)
What I did was the following-raise the bike with the lift, unhook the linkage, remove the bolt, put the linkage bolts back in, lower the bike, put it up on the rear stand to do the work.
Unhooking the linkage wasn't bad, with an assistant. I basically took the nuts off which involved my assistant holding the nuts in place, while I used the T55 star socket on the breaker bar to loosen them. Then had my assistant gently lift and lower the rear wheel while I worked the bolts out. The linkage can then be wiggled out. Then I removed the sump bolt underneath the linkage, and put the bolts back in, the one closer to the front of the bike first, and then the rear one. Again, having someone raise and lower the rear wheel helped a lot.
Here's a photo of the linkage from the right side of the bike:
 |
| From Shiter shaft replacement |
and from the right, with the nuts off:
 |
| From Shiter shaft replacement |
Then, with the bike on the rear stand, I took out the bolts holding on the sump. There's 17 bolts, 15 black ones around the edge (14, if you've already taken off the one underneath the linkage,) and two silver ones in the middle that are a pain in the ass to find. There's three big bolts that seem to be different oil drain plugs, kind of in a row from left to right if you're sitting on the bike. The two silver bolts are kind of in the gaps between these plugs. One isn't so bad to find, but the one to the left of the bike is up in there kind of far.
The sump cover should come right off, clean the old gasket junk off the cover and the bike. I carefully used a razor blade.
5. Remove the oiler tube
Here's the oiler tube:
 |
| From Shiter shaft replacement |
I wish I had removed this earlier-it would have saved me some pain. There's two bolts holding it on, with brass washers on either side of the tube. It might require some light wiggling to remove. Beware dripping oil!
6. Remove the sprocket cover.
There was certainly some cursing here on my part. There's 8 bolts holding this guy on. There's two long ones, a medium one, four short ones, and a very short one. First remove the three bolts around the clutch cylinder:
 |
| From Shiter shaft replacement |
There's two very long bolts and the very short bolt, as I remember. After removing these, gently twist, wiggle, and curse the clutch cylinder out. There's a rod that extends into this, be careful. After you get the cylinder off, pull out the rod.
Then I took out the bolts around the broken shifter, there's two short ones, and the medium bolt like so:
 |
| From Shiter shaft replacement |
Then there's two more bolts on the cover, one towards the top, and one towards the bottom.
After you get all of the bolts out, and the clutch cylinder removed, use this trick I got from webbikeworld. Get a 8mm box wrench, and bolt it to where the clutch cylinder was. Gently tap the cover with a rubber mallet and pull on the wrench to get the cover off-there's a gasket that's kind of holding it on.
Be disgusted with the insane amount of dirt that collects in there.
Clean the old gasket off the bike and cover.
7. Remove the broken shifter!
Start by removing the circlip and washer from the outside of the shifter, as well as the stopper bolt to the left of the shifter:
 |
| From Shiter shaft replacement |
Then get up underneath and remove the circlip from the other side of the shifter. These pictures were from before I discovered I needed to remove the oiler tube. Sorry the pictures are out of focus:
 |
| From Shiter shaft replacement |
 |
| From Shiter shaft replacement |
Take off the washers, the spring guide, and the spring:
 |
| From Shiter shaft replacement |
 |
| From Shiter shaft replacement |
Here's where it gets fun. Hopefully, it's easier for you. You might want to start cursing now to warm up.
Remove the stopper plate. This is the plate between the the Quadrant (that's the part of the shifter shaft with the teeth on it,) and the gearchange drum (the big cylinder deal with the grooves in it.)
You can kind of see it here:
 |
| From Shiter shaft replacement |
The plate is held on by two bolts, one on the bottom, and one on the top. It was a tremendous pain to get the plate out. What finally worked for me was to manually rotate the drum in a counter clockwise position if you were facing the right side of the bike. After doing this, I could see almost all the teeth of the quandrant teeth and the pawl carrier. This is what the removed plate looks like from the right side of the bike:
 |
| From Shiter shaft replacement |
After you get the plate off, the gearchange shaft should come out.
8. Put in the new shifter!
This should slide right in. To mesh the gears properly, one of the quandrant teeth should be on the outside of the pawl carrier on either side. You can rotate the gearchange shaft to make sure it's good.
Put the stopper plate back on. A lot of wiggling and cursing helped me here. Getting the little tab in there right helps. No good advise from me on this.
Put the washer and circlip on the outside of the bike where the shifter shaft comes out, and replace the stopper bolt.
Put the spring back on the inside of the shifter, making the prongs go on either side of the quadrant peg and stopper bolt:
 |
| From Shiter shaft replacement |
Put the spring guide back in, the two washers, and get ready for some cursing! The circlip that goes on there is a pain to get back on. Lots of pressing on the washers, the circlip popping back off, and cursing. Looking at the circlip on the outside will tell you how it should look on the inside when on.
9. Put back on the oiler tube.
It should be pretty self explanatory. Remember it's washer, oil tube, washer, bolt.
10 . Put back on the oil sump.
I used some gasket sealer (non-hardening) from autozone and the gasket. Tighten the bolts in a star pattern to 12 nM. I put all of them in, except the one under the rear linkage. I reversed the process of lifting and removing the linkage from above to get the last one back on.
11. Put the sprocket cover back on.
Gasket w/sealer. pretty simple. Put the rod back in and the clutch cylinder. You might need to bleed the clutch after this.
12. Put the exhaust back on, headers first.
Tuesday, February 1, 2011
Hulk smash!
Just found out from bikebandit today that they hadn't shipped my $211 parts order because they were waiting on a 76-cent circlip and wanted to ship everything together! They shipped it tonight(sans circlip,) and since they're in San Diego, it shouldn't take more than a couple of days. I'm going to give the kid $20 to photograph the whole process on Saturday!
UPDATE: Received the parts the next day. Here's the extra fun-I had ordered two circlips, and one hadn't shipped to them yet. They thought. What happened was Triumph but both circlips in one bag, so they had both parts all along. *facepalm*
UPDATE: Received the parts the next day. Here's the extra fun-I had ordered two circlips, and one hadn't shipped to them yet. They thought. What happened was Triumph but both circlips in one bag, so they had both parts all along. *facepalm*
Monday, January 24, 2011
Yet another project bike.
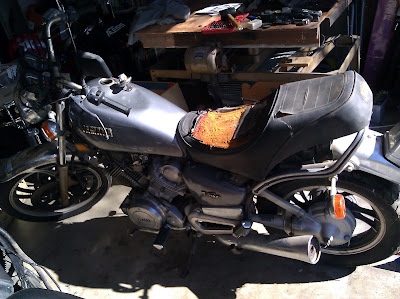
So the katana has become a father/son project bike. The only problem is that I often want to work on it when he doesn't. Luckily, a friend knew I liked to tinker, and offered me his old bike as a project bike. He doesn't even change his own oil, so when the front brake wen out, he parked it. Five year later, his wife is hassling him to get rid of it, and he wants it in a good home. So here's my new project, a 1982 Yamaha Virago 750:
 |
| From 1982 Yamaha Virago XV750 |
 |
| From 1982 Yamaha Virago XV750 |
|
| From 1982 Yamaha Virago XV750 |
Saturday, January 22, 2011
Shifter!
Here's the new shifter from Faster Minis, along with the old one for comparison:
The only problem is that it doesn't extend away from the bike as much, and it has that square corner where it folds. This is kind of a good thing too, in that I don't think it will leverage against the shaft as much if the bike goes down. I'm going to file down that corner so it doesn't rub, but I knew about that going in, from the guy who recommended that shifter.
 |
| From Motorcycle restore blog |
The only problem is that it doesn't extend away from the bike as much, and it has that square corner where it folds. This is kind of a good thing too, in that I don't think it will leverage against the shaft as much if the bike goes down. I'm going to file down that corner so it doesn't rub, but I knew about that going in, from the guy who recommended that shifter.
Stuff on the way!
I've ordered the stuff to replace the shaft from bikebandit.com. Hopefully It will be here in the next couple of weeks, it's been one week already. I decided to just go ahead and replace everything, including bushings, springs, washers, while I was in there anyway.
Here's the parts list from bikebandit:
H/LIGHT & IND BRKT,LH,CHROME,B : 1396967 (5575423-001)
CIRCLIP : 1380659 (5559024-001)
CIRCLIP : 1380659 (5559024-001)
WASHER,THRUST,12X18X1.2 : 2126306 (5559043-001)
SHAFT ASSY, GEARCHANGE : 1378708 (5557073-001)
BUSH, SPRING LOCATION : 1378712 (5557077-001)
RETURN SPRING, GEARCHANGE : 1378704 (5557069-001)
BOLT, SPRING ABUTMENT : 1378705 (5557070-001)
GASKET,SUMP 3CYL : 1388088 (5566524-001)
I've also ordered a folding shifter from Faster Minis. This should fit the legend, and will hopefully fold up if the bike goes down again, rather than breaking the shaft.
In the bikebandit parts list, you'll notice "H/LIGHT & IND BRKT,LH,CHROME,B" is not part of the shift assembly. I decided to go ahead and replace the one I hacked together with wire and JB weld, because I ordered a flyscreen! Hopefully, this will push the wind off of my neck-it's next to impossible to go past 60mph, because of the flutter against my throat. Here's a thunderbird with the same flyscreen:
Subscribe to:
Posts (Atom)